

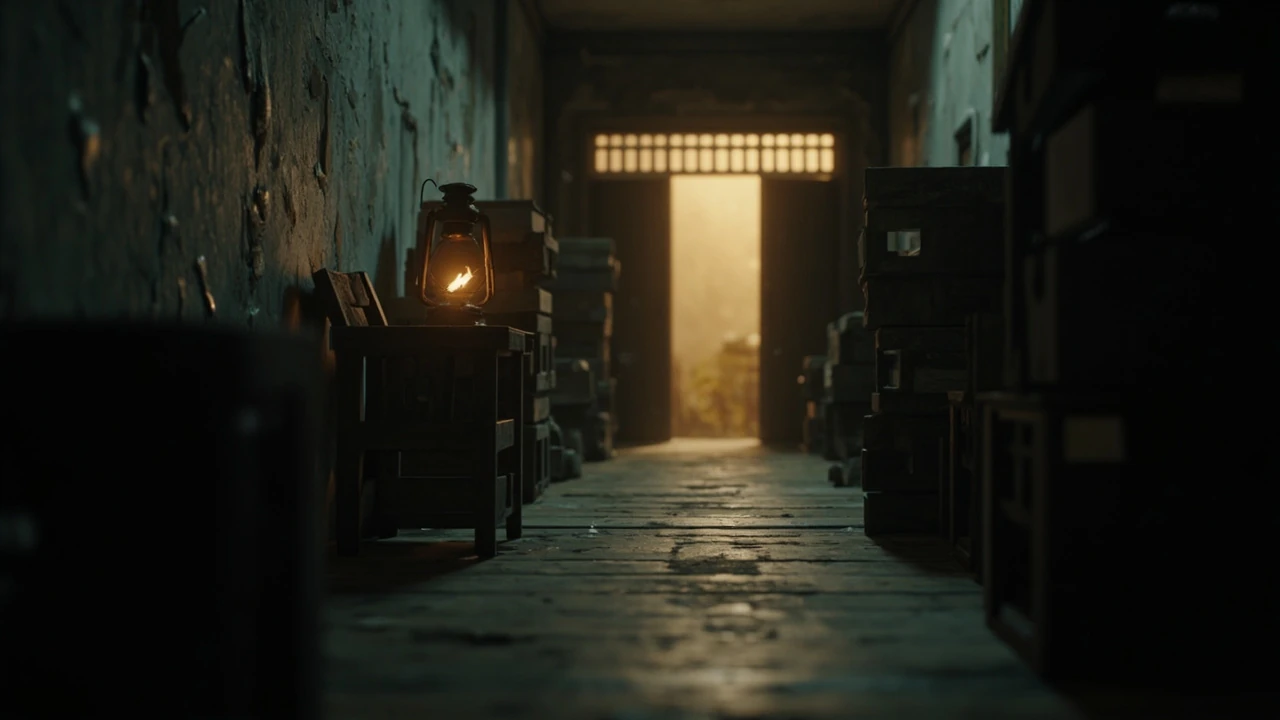
re9 orphanage walkthrough: a developer-grade field guide to the Resident Evil Requiem segment
The orphanage in Resident Evil Requiem is a short, dense environment that does a lot of work in a small footprint. Players enter through a service door, navigate a network of dormitories, classrooms, and service rooms, and leave through a courtyard that opens onto the next map. The segment is built around three pressures that any designer will recognize: limited inventory, tight resource pacing, and a save system that rewards route knowledge. A clean re9 orphanage walkthrough therefore needs to do more than list doors. It has to explain the room order, the puzzle dependencies, the encounter windows, and the design decisions that make the segment feel tense even on a second run.
This guide treats the orphanage as a study in survival-horror level design. It maps the segment room by room, calls out the items and resources a player should keep, walks through each puzzle and lock, and explains the save and shortcut logic that RE Requiem uses to soften or amplify its difficulty. The goal is to give a player a reliable route while also giving a developer or level designer enough context to understand why the segment is structured the way it is.
What the orphanage segment actually contains
The orphanage is a single connected building with two floors, a basement, and an attached service wing. From a level-design perspective it is a textbook example of a “return hub” structure: a small, readable central space that the player crosses several times while peripheral rooms open, close, and repopulate as the story advances. Resident Evil Requiem uses the orphanage to introduce the player to several of the series’ signature systems: limited carrying slots, a save room with a single typewriter, locked doors that require items gathered elsewhere, and a back-tracking pattern that always hands the player a small new reward for revisiting a familiar room.
Understanding the orphanage is therefore partly a map problem and partly a systems problem. A player who memorizes the map without understanding how saves and resource pacing work will still feel rushed; a player who understands the systems but has no map reference will waste inventory slots walking past items they need later. The walkthrough below combines both.
Entry point and first read of the space
Players enter from a service corridor that connects to a back alley. The first room is a small cloakroom with a mirror, a bench, and a single save point on a desk. RE Requiem deliberately stacks two readability cues here: the typewriter is on the left, and the mirror gives a clean view back toward the entry door. Designers familiar with the series will recognize this as a “save anchoring” pattern, where the first save point in a new map is placed close enough to the entry that a player can experiment without high retry cost.
On first entry, the player can safely explore the cloakroom, the adjoining washroom, and a short hallway leading to a stairwell. Doors to the dormitory wing, the classroom wing, and the basement are visible but locked. The hallway also contains the segment’s first optional pickup, a small consumable on a tray. Take it; the orphanage’s resource economy is tighter than the opening map suggests.
The two-floor map at a glance
| Floor | Primary rooms | Locked on entry | Unlocks after |
|---|---|---|---|
| Ground floor | Cloakroom, washroom, main hall, kitchen, dining room, courtyard | Kitchen pantry, dining room side door, courtyard gate | Kitchen key, dining room lever, courtyard fuse |
| Upper floor | Dormitory A, dormitory B, classroom, infirmary, library, balcony | Dormitory B, classroom cabinet, infirmary medicine chest | Dormitory key, classroom combination, infirmary key |
| Basement | Boiler room, storage cellar, root cellar, hidden passage | Root cellar grate, hidden passage wall | Boiler valve, root cellar key, mechanism item |
The table is a useful reference while reading the rest of the walkthrough. It is also a useful reference for designers: the orphanage has three floors but only five real locks, which is a deliberate design choice. RE Requiem wants the player to feel that the building is full of content while keeping the actual gating count low enough to track in memory.
Pre-segment preparation: what to bring into the orphanage
Inventory management is the single most important skill in the orphanage. The segment is short, but the resource peaks and valleys are sharp. A player who walks in with a full carrying case will have to leave healing items behind at the worst possible moment, while a player who walks in empty will not have the consumables needed to survive the second-floor encounters.
- Two healing items, ideally one full heal and one partial heal. The orphanage does not hand out many healing drops, and the second floor contains two encounters that can drain a large chunk of health.
- One defensive item if the player unlocked one in the previous map. The dormitory B encounter in particular punishes players who try to brute-force it with offense.
- Ammo proportional to the player’s last segment. Resident Evil Requiem carries over ammo between maps but not between entire chapters, so a player near an ammo peak should bring as much as they can carry.
- One empty slot. Several key items in the orphanage are quest items that cannot be discarded, and the player needs a free slot to pick up the first one without immediately having to manage inventory.
Designers reading this should note that the segment’s resource pressure comes not from scarcity but from slot scarcity. The orphanage actually contains slightly more healing items than the player can use in a clean run, but the items are spread across three floors, and back-tracking costs time and encounter risk. The design is forcing a real choice, not an artificial one.
Room-by-room re9 orphanage walkthrough
The walkthrough below follows a single safe route that resolves all puzzles and encounters in a logical order. The route is written for a first-time player but is also the most efficient path on a repeat run, because it never back-tracks a step it has not already unlocked.
Step 1: Ground-floor loop
From the cloakroom save room, head into the main hall. The hall has three doors: one to the kitchen, one to the dining room, and one to the courtyard. All three are locked, but the hall itself contains two pickups and a readable note that gives a soft hint about the kitchen key. Read the note; it is not flavor text. The orphanage’s puzzle hints are written in-character and easy to miss, and a surprising number of players get stuck on the dining room because they skip the hallway reading.
Use the kitchen door key once the player finds it (the key is in the washroom mirror cabinet, which is the first optional pickup most players miss). The kitchen contains a recipe, a partial heal, and the kitchen pantry key. The pantry is the source of the first real healing surplus in the segment; check the upper shelves before leaving.
Step 2: Dining room lever and courtyard fuse
Back in the dining room, use the lever on the side door to open a shortcut back to the main hall. This is the segment’s first quality-of-life reward: a one-way door that saves several seconds of back-tracking. The dining room also has a locked drawer with ammo; the combination is on a note in the library, but the library is upstairs, so the player will need to come back.
The courtyard gate needs a fuse, which is in the boiler room in the basement. To reach the boiler room, the player must drop into the basement through the storage cellar. The storage cellar entrance is a hatch behind a movable crate in the main hall; the hatch opens with a button on the side, not a key, so a player who forgets to push the crate will think the hatch is sealed.
Step 3: Basement descent and the boiler room
The basement has three rooms: a boiler room, a storage cellar, and a root cellar behind a locked grate. The boiler room contains the fuse the player needs, but the room is also the segment’s first scripted encounter. The encounter is not a boss; it is a short, sharp chase sequence that ends when the player pulls a valve. Pull the valve even if the player thinks they are not in danger; the encounter triggers on a timer, not on player position.
After the encounter, take the fuse and use it on the courtyard gate. The courtyard is the segment’s only outdoor space and is worth exploring for the optional pickup near the well, but it is also the point of no return for the ground floor: once the player leaves the courtyard, the ground-floor doors reseat, and the player cannot return without restarting the segment.
| Room | Key item | Encounter | Returns to hub? |
|---|---|---|---|
| Boiler room | Courtyard fuse | Timed chase sequence | No, must exit via storage cellar stairs |
| Root cellar | Root cellar key | None, but a scripted audio cue warns the player not to linger | Yes, to storage cellar |
| Hidden passage | Mechanism item | Single ambush by a crawling enemy | One-way, leads to upper-floor library |
Step 4: Upper-floor loop
The upper floor is the segment’s design peak. The dormitories, classroom, infirmary, and library form a small hub-and-spoke that mirrors the ground-floor hall. The For additional context, pattern is intentional: RE Requiem wants the player to learn the ground-floor navigation on the first pass, then reapply the same mental model upstairs with more pressure. A player who understood the ground floor will find the upper floor familiar; a player who did not will get lost in the first minute.
Start with dormitory A. It is unlocked and contains a partial heal and a readable note about the dormitory B key. The dormitory B key is in the infirmary, but the infirmary is locked, and the key is in the classroom. The classroom, in turn, requires a combination found in the library. The library is the only upper-floor room that the player cannot reach from the dormitory corridor; it is accessed through the hidden passage from the basement.
This chain is the orphanage’s most important puzzle. It is also the most common place where a first-time player stalls. The chain works as follows:
- Hidden passage from the basement leads to the library. Take the combination note from the librarian’s desk.
- Return upstairs and enter the classroom. Use the combination on the locked cabinet. Inside is the infirmary key.
- Use the infirmary key on the infirmary door. Inside is the dormitory B key, plus a full heal and a defensive item if the player did not bring one in.
- Use the dormitory B key to open dormitory B. The room contains the segment’s main story item and triggers the second-floor scripted encounter.
Step 5: The second-floor encounter
The dormitory B encounter is the orphanage’s only mandatory combat set piece. It is designed to test whether the player has been managing ammo and health properly, and it punishes hoarding. The encounter is a wave of two to four enemies depending on difficulty, followed by a single elite enemy that drops a key item. The key item is the orphanage’s exit token, and the player should pick it up only when ready to leave, because picking it up reseats the upper-floor doors and forces a one-way return to the ground floor.
For developers, the encounter is a useful study in difficulty scaling. RE Requiem does not increase enemy health on harder difficulties; it increases the number of enemies and reduces the healing drops. The orphanage’s second-floor encounter therefore feels the same on every difficulty but lasts longer on harder settings, which is a more player-respecting design than simply inflating numbers.
Save and shortcut logic across the segment
Resident Evil Requiem uses a single save system across the whole game: typewriters in dedicated save rooms, with a finite ink ribbon supply. The orphanage contains only one save room (the cloakroom on the ground floor), which means the player has to plan save usage around back-tracking.
The shortcut system is more interesting. The orphanage has three permanent shortcuts: the dining room lever, the courtyard gate, and the upper-floor balcony door. Each shortcut shortens a back-tracking route by roughly ten to fifteen seconds. The shortcuts are not signposted, and the game does not tell the player when one opens, which is a deliberate choice. The shortcuts feel like discoveries rather than unlocks, and they are the segment’s main reward for exploration.
| Shortcut | Trigger | Saves time on | Permanent after |
|---|---|---|---|
| Dining room lever | Pull lever in dining room side room | Kitchen to main hall | Yes, persists after segment |
| Courtyard gate | Install fuse in courtyard gate | Main hall to courtyard exit | Yes, used by next map |
| Balcony door | Defeat dormitory B elite | Upper floor to courtyard | Yes, used by next map |
For designers, the persistence of the shortcuts across the segment boundary is the more important detail. RE Requiem wants the player to feel that their exploration in the orphanage pays off in the next map. This is a small but real example of how a level can teach a player to explore by rewarding exploration with persistent world state, not with a checklist.
Item priority and what to drop in an emergency
Inventory pressure in the orphanage is real. The segment gives the player nine quest items across three floors, and the carrying case in Resident Evil Requiem has eight main slots plus two quick slots reserved for healing and ammo. That leaves no margin for a player who picks up every optional item. The list below ranks the orphanage’s pickups by priority so a player knows what to drop if they have to.
- Keep: courtyard fuse, dining room lever (quest item), dormitory B key, infirmary key, classroom combination, exit token. These are mandatory progression items.
- Keep if slot available: full heal in the infirmary, defensive item in dormitory A, ammo in the dining room drawer. These are high-value resources that are hard to replace.
- Drop first: optional partial heals, recipe notes, readable flavor text. These are recoverable on a second pass and do not affect the segment’s outcome.
- Drop only as a last resort: ammo for the player’s secondary weapon. The orphanage’s combat encounters are designed around the primary weapon, and a player who runs out of secondary ammo will not need it for the rest of the segment.
Designers reading this should note the asymmetry. The game never forces the player to drop a progression item, but it does force a real choice between two resources. That choice is the segment’s core tension.
Common failure modes and how to avoid them
Players tend to fail the orphanage in the same five ways. Each failure is a useful design signal, because the failure mode is usually a side effect of a deliberate choice the level designers made.
- Skipping the washroom mirror cabinet. The first kitchen key is hidden behind a breakable mirror panel that only opens if the player looks at the mirror from a specific angle. The design is testing whether the player examines interactive objects carefully.
- Missing the storage cellar hatch. The hatch is hidden behind a crate that the player has to push. The push is not signposted, and the hatch looks like a wall until the crate moves. The design is testing whether the player explores the main hall thoroughly.
- Reading the wrong note first. The orphanage’s notes are scattered across all three floors, and the most important hint (the classroom combination) is in the library, not the dormitories. A player who reads notes out of order will spend several minutes back-tracking.
- Triggering the dormitory B encounter early. The encounter locks the dormitory B door and forces a fight. A player who opens the door before picking up the infirmary key will not be able to heal between the wave and the elite enemy.
- Leaving the courtyard too early. The courtyard’s optional pickup is near the well, and the player has to walk past the well to reach the exit. A player who rushes to the exit will miss the pickup and have to restart the segment to retrieve it.
None of these failures are punitive. The game never blocks progress for more than a minute or two, and each failure is recoverable without a death. That is the segment’s most important design property: the orphanage is hard to read on a first pass but cheap to retry, which is exactly the difficulty profile Resident Evil Requiem wants for a mid-game teaching segment.
Design lessons the orphanage teaches about survival-horror level design
The orphanage is short enough to study end to end, which makes it a useful reference for designers who want to build a tight, readable, three-floor hub. The list below is a developer-facing summary of the segment’s design choices, with notes on what each choice achieves.
- Use a small number of locks, not a large one. The orphanage has five real locks, which is a number a player can hold in working memory. Adding more locks would have made the segment feel like a puzzle box rather than a place.
- Stack readability cues in the first room. The cloakroom save point and mirror are doing two jobs at once: they tell the player where to save, and they tell the player where the entry door is. Both cues are necessary for the rest of the segment to work.
- Make back-tracking cheaper, not shorter. The three shortcuts do not reduce the segment’s length. They reduce the cost of returning to a previous room, which is a different problem. A player who knows the shortcuts feels smart; a player who does not feels lost.
- Hide progression hints in flavor text. The orphanage’s notes are written in-character, which means a player who skips them loses information. The design is testing reading behavior, not pattern matching.
- Tie resource pressure to slot pressure, not to scarcity. The segment has slightly more healing items than the player needs. The pressure comes from not being able to carry them all at once, which is a more interesting design than simply making healing rare.
What the orphanage sets up for the next map
The orphanage is the last segment in Resident Evil Requiem’s first chapter, and the courtyard exit leads directly into a much longer, more open map. The shortcuts the player unlocked in the orphanage persist into the next chapter, which means the player’s exploration in the orphanage has a real payoff. The exit token from dormitory B also unlocks a new vendor option, and the items the player left behind in the orphanage can be revisited on a second pass through the chapter, but not without cost: revisiting the orphanage requires a dedicated return trip, and the enemies that respawned in the meantime are harder than the originals.
For a developer, the orphanage is a useful case study in how a small level can do real structural work. The segment introduces three core systems (saves, shortcuts, slot pressure), teaches them through a single contained environment, and exits into a larger map with the player already fluent. That is the design goal of a good teaching segment, and the orphanage achieves it without feeling like a tutorial.
How to use this walkthrough on a second or third run
The walkthrough above is written for a first-time player, but it is also the fastest route on a repeat run. The only adjustments a returning player should make are:
- Skip the courtyard well pickup. The pickup is useful on a first run but skippable on a repeat run, and the time saved compounds across multiple playthroughs.
- Save once, in the cloakroom, immediately after picking up the exit token. The encounter in dormitory B is the only mandatory fight, and a save right after the token pickup gives the player a clean reset point for the courtyard exit.
- Do not explore the dining room side room on a repeat run. The lever is a permanent shortcut and does not need to be re-pulled, and the room has no other pickups.
These three changes cut roughly two to three minutes from a clean run, which is meaningful for a speedrun or a low-percentage playthrough. For a casual player, the differences are not worth optimizing; the segment is short enough that a clean casual run is already close to optimal.
Frequently asked questions
Where is the first save room in the orphanage?
The first save room is the cloakroom just inside the service entry on the ground floor. The typewriter is on the left side of the room, next to a bench and a mirror. The save room is the segment’s only save point, so plan inventory and ammo around a single use.
How do I open the storage cellar hatch in the main hall?
The hatch is hidden behind a movable crate on the right side of the main hall. Push the crate toward the wall to reveal the hatch, then press the button on the side of the hatch to open it. The hatch is not signposted, and a player who does not push the crate will think the hatch is sealed.
Where is the kitchen key in the orphanage?
The kitchen key is in the washroom mirror cabinet, which is the small room off the cloakroom. The mirror panel is breakable, and the key is on the shelf behind it. The key is the orphanage’s first progression item, and missing it stalls the entire ground-floor loop.
What is the fastest route through the orphanage in Resident Evil Requiem?
The fastest route is the room order used in this walkthrough: ground-floor loop, basement descent, upper-floor loop, dormitory B encounter, courtyard exit. On a repeat run, skip the courtyard well pickup and do not re-explore the dining room side room, which cuts two to three minutes from a clean casual run.
Are the orphanage shortcuts permanent in Resident Evil Requiem?
Yes. The three orphanage shortcuts (the dining room lever, the courtyard gate, and the upper-floor balcony door) persist into the next map and are used by the next chapter’s return routes. The shortcuts do not need to be re-pulled on a return visit to the orphanage.
What should I drop first if my inventory is full?
Drop optional partial heals and recipe notes first. These are recoverable on a second pass and do not affect progression. Drop secondary ammo only as a last resort, because the orphanage’s combat encounters are designed around the player’s primary weapon, and a player who runs out of secondary ammo will not need it for the rest of the segment.
Is the orphanage harder on higher difficulty in RE Requiem?
The orphanage’s enemy health does not change on higher difficulty, but the number of enemies in the dormitory B encounter does. The second-floor encounter therefore feels the same on every difficulty but lasts longer on harder settings. The orphanage is also one of the segments where the save ink ribbon supply is most restrictive, so a player on harder difficulty should save only in the cloakroom and only once.
What carries over from the orphanage to the next map?
Inventory items (weapons, ammo, healing items, quest items) and shortcut state carry over from the orphanage to the next map. Readable notes and recipe notes do not carry over, because they are flavor text and have no mechanical effect outside the orphanage. The exit token from dormitory B is consumed on use and does not persist into the next map.
Can I return to the orphanage after leaving through the courtyard?
Yes, but only through a dedicated return trip in the next chapter, and the enemies that respawn in the orphanage are harder than the originals. The return trip is worth doing for the items the player skipped on the first pass, but it is not required for any progression item or story beat.
How long does the orphanage segment take in Resident Evil Requiem?
A first-time player typically spends 30 to 45 minutes in the orphanage, including all puzzles, encounters, and optional pickups. A repeat run with a known route typically takes 12 to 18 minutes, and a speedrun-optimized run is closer to 8 to 10 minutes. The segment is short by design, and the length is one of the reasons it works as a teaching environment.





Leave a Reply